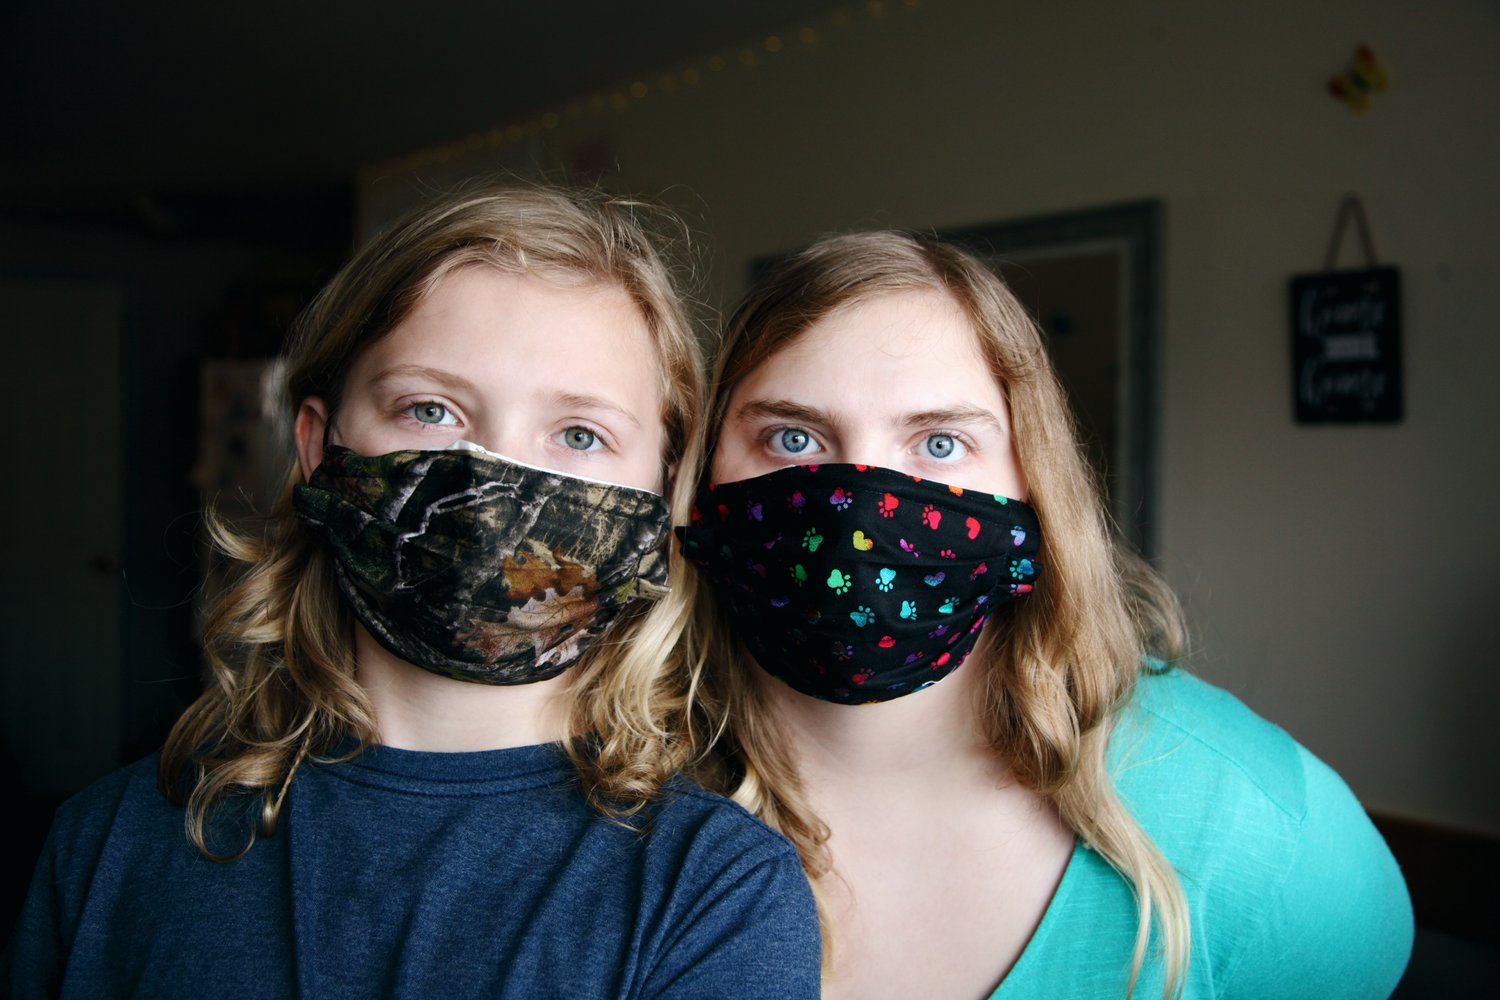
With states around the country requiring face coverings to be worn in public settings, it is essential that you get your hands on a mask. According to the Centers for Disease Control and Prevention, a simple cloth can be worn over the mouth or nose when in a public setting to help prevent the spread of the Coronavirus. The CDC urges to not use medical-grade masks, as those are critical supplies that should be reserved for healthcare workers.
When looking for a mask, the supplies are right inside your home. Making your own mask is an efficient and sustainable way to reuse textiles.
No Sewing Required!
To start, all you need is an old t-shirt and scissors. Since we are in the midst of spring cleaning, it is likely you have shirts you want to donate. You can use part of the shirt for a mask, and then donate the rest to Planet Aid.
- Take t-shirt, and cut seven to eight inches up from the bottom.
- To make strings, take one side of the fabric and cut out the middle by going six to seven inches inside.
- Snip the ends so that you are able to tie it around your neck and the top of your head.
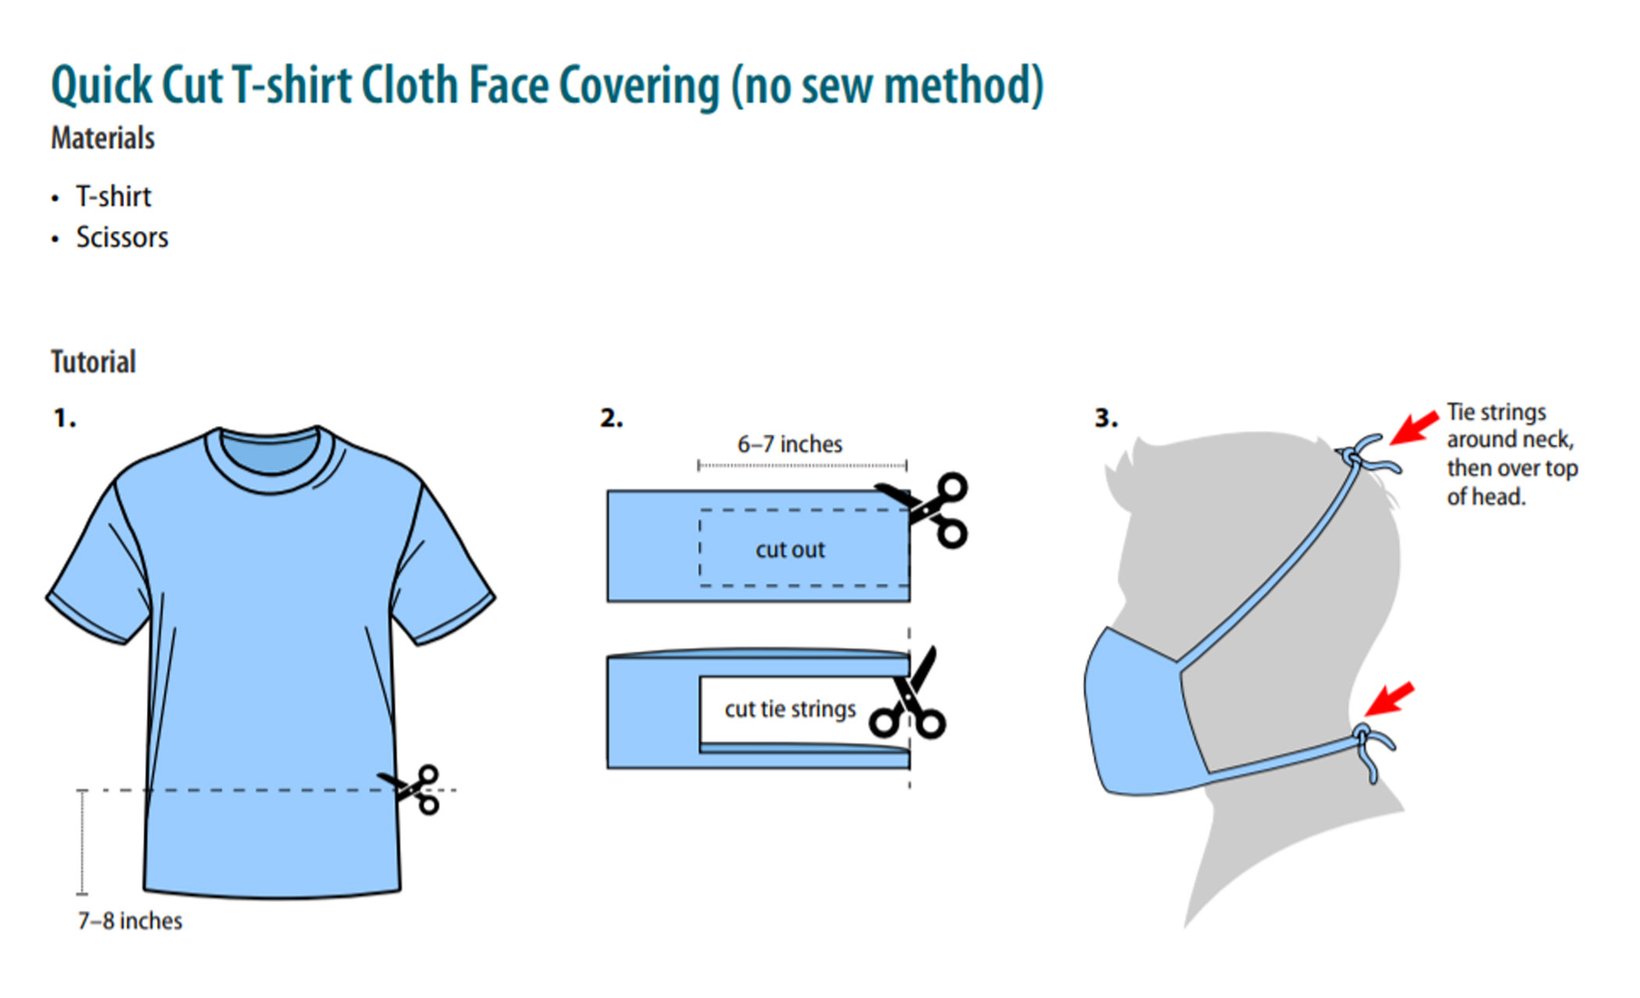
Diagram provided by the CDC.
There is another no sewing method to making a mask that requires a bandana or a 20x20 inch square cloth, rubber bands or hair ties, and scissors.
- Fold the cloth in half.
- Then fold the top half down and bottom half up.
- Place the rubber band or hair ties about six inches apart to create that will go around your ears.
- Fold the sides of the cloth into the middle and tuck them.
- Then place rubber bands or hair ties around your ears and cloth over mouth and nose.
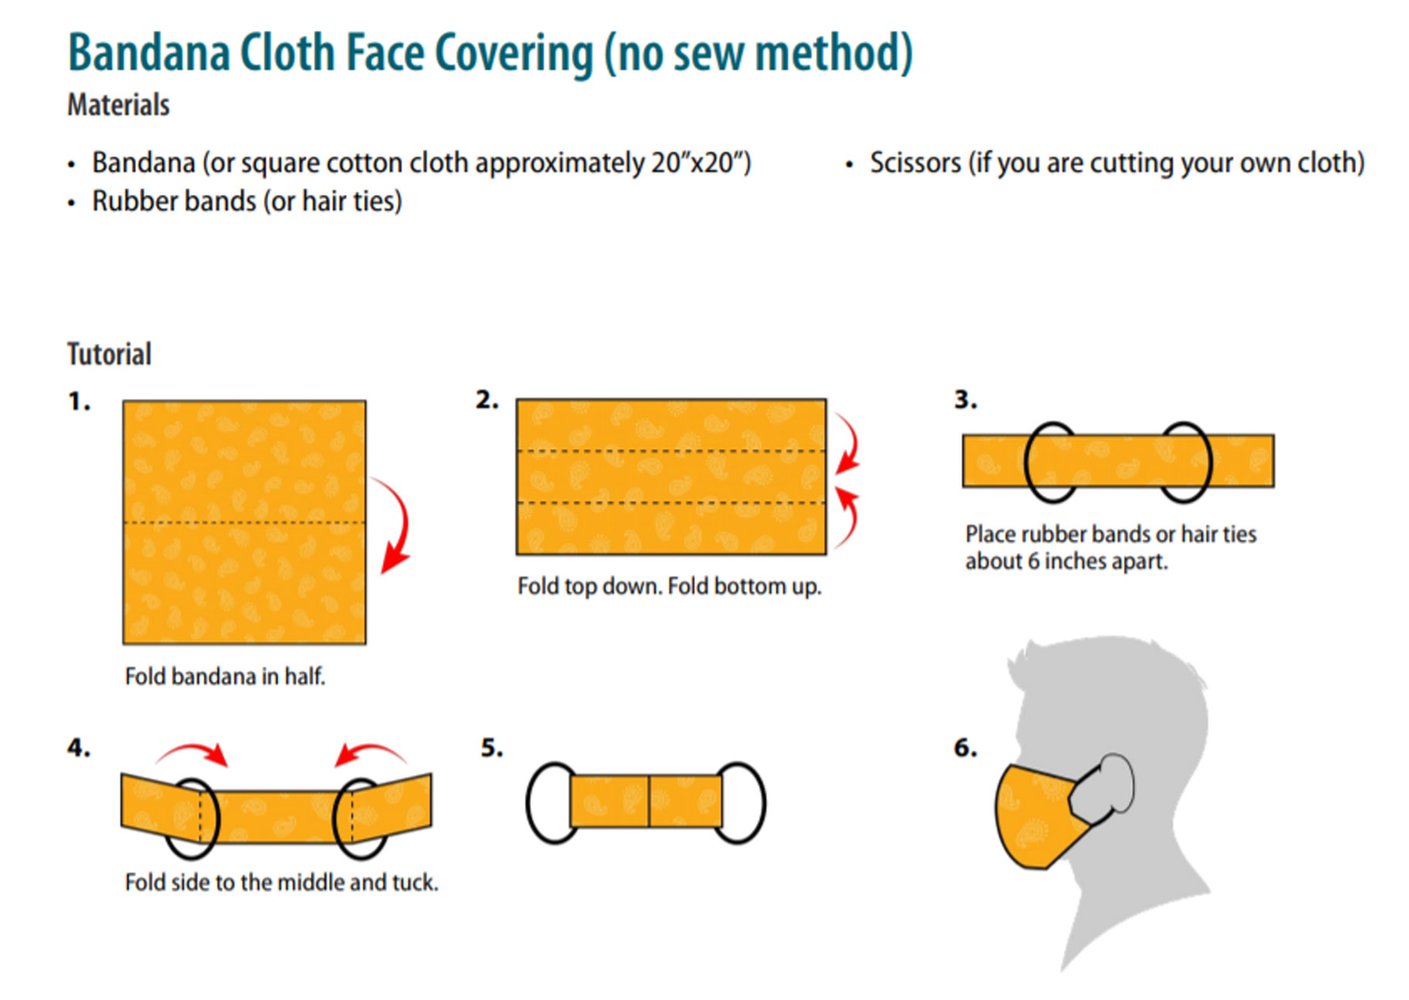
Diagram provided by the CDC.